How to replace the DE1 pressure sensor
![]()
This video is part of a series that we produce, helping people self-repair their Decent Espresso Machine.
In this video, we'll walk you through the entire process of replacing a pressure sensor. You'll need to do this if the sensor has failed and is now broken.
The sensor usually only breaks if there's a leak around the sealing o-ring, though it can (rarely) sometimes fail on its own.
#repair #diy #pressuresensor #howto #pressure
Tools Needed:
Step 1: Power Disconnection
For XL or XXL Models:
1. Remove the back panel.
2. Turn off the machine's back switch.
3. Unplug the power cord.
For Pro and Plus Models:
1. Turn off the machine's back switch.
2. Unplug the power cord.
For Version 1.43 or Higher (Slide-Type Tablet Stand):
1. Unplug the USB cable.
2. Gently pull the tablet stand out.
For Version 1.3 to 1.42 (Screw-Type Tablet Stand):
1. Unscrew the three screws holding the tablet stand.
2. Remove the stand.
Step 2: Prepare the Machine
1. Remove the drip tray and drip tray cover.
2. Lift the lever on the back of the machine and drag out the water tank.
3. Remove the portafilter and group head handle.
Step 3: Remove the Main Cover
1. Use a T10 Torx screwdriver to remove the 8 screws on the main cover.
2. Gently stretch the sides of the cover and lift it off the machine.
Step 4: Remove the Chassis & Manifold
1. Check the screw type on the chassis:
2. Remove the six screws securing the chassis.
Step 5: Remove the Main Manifold Screws
1. Check the screw type:
2. Remove the three screws first.
3. For the last screw, hold the bracket under the sensor to prevent it from falling.
Step 6: Disconnect the Pressure Sensor
1. Unplug the brown temperature sensor cable first for better access.
2. Remove the pressure sensor cable:
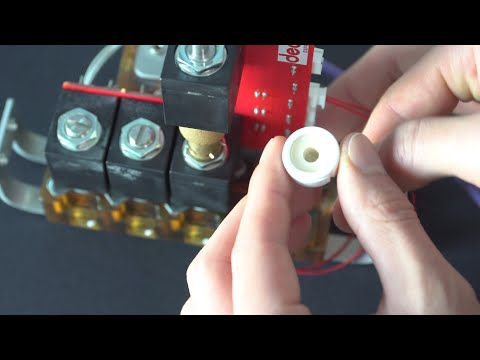
Step 7: Remove the Old Sensor
1. Pull the bracket from underneath the sensor.
2. Carefully lift the sensor out by its cable.
Step 8: Optional – Remove the Purple Tube for Easier Installation
1. Remove the clip on the purple tube connector.
2. Pull the tube out.
Step 9: Install the New Sensor
1. Insert the new sensor into the mount, ensuring the O-ring stays in place (on top).
2. Thread the cable through the bracket hole.
3. Hold the bracket under the sensor while screwing in the first screw.
4. Install the remaining three screws to secure fully.
Step 10: Reconnect Cables & Components
1. Pressure sensor cable:
2. Brown temperature sensor:
3. Purple tube (if removed):
Final Steps
1. Reassemble all removed parts in reverse order.
2. Reconnect power and test the machine.
For any questions, feel free to reach out. Thank you!
#documentation #repair #DIY #howto
john updated 2025/04/23