How to replace the DE1 AC Board
![]()
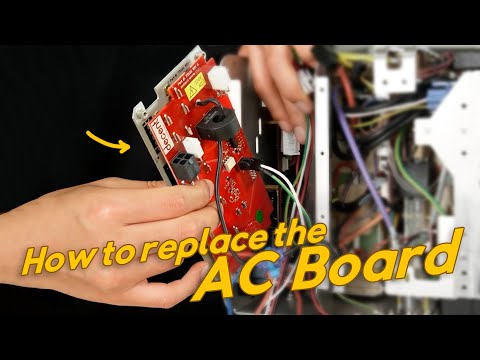
In this video, we'll walk you through how to replace the AC board.
You'll need to open the board room to access the AC board if AC-powered components are not functioning properly.
*Important: Do not open the board room or attempt to access the AC board without our guidance. The AC board carries high voltage.
This video is part of a series that we produce, helping people self-repair their Decent Espresso Machine.
- Only do this repair in consultation with Decent tech support
- Doing otherwise might break your machine or void your warranty.
- 00:05 Tools Needed
- 00:10 Power Disconnection
- 00:31 Remove External Components
- 01:12 Remove the Main Cover
- 01:35 Remove the Chassis
- 02:55 Remove the Back Panel
- 03:50 Disconnect AC Board Cables
- 05:33 Prepare Wires for New AC Board
- 06:08 Install the New AC Board
- 08:20 Secure the AC Board
- 09:01 Reassemble the Machine
Tools Needed
- T10 Torx screwdriver
- PH2 Phillips screwdriver
- Adjustable wrench (XL/XXL only)
- Pliers (Long nose pliers are recommended)
- Nippers (for cable ties)
- Comfort grip gloves (recommended)
- Cloth (to protect the machine)
- Cable tie
Step 1: Power Disconnection For XL or XXL Models:
- Remove the back panel.
- Turn off the machine's back switch.
- Unplug the power cord.
For Pro and Plus Models:
- Turn off the machine's back switch.
- Unplug the power cord.
For Version 1.43 or Higher (Slide-Type Tablet Stand):
- Unplug the USB cable.
- Gently pull the tablet stand out.
For Version 1.3 to 1.42 (Screw-Type Tablet Stand):
- Unscrew the three screws holding the tablet stand.
- Remove the stand.
Step 2: Remove External Components
- Remove the drip tray and drip tray cover.
- Lift the lever on the back and slide out the water tank.
- Remove the portafilter and group head handle.
Step 3: Remove the Main Cover
- Use a T10 screwdriver to remove the 8 screws on the main cover.
- Gently stretch the sides of the cover and lift it off.
Step 4: Remove the Chassis
- Check if the manifold screws are T10 Torx or PH2 Phillips.
- Remove the six screws securing the chassis.
- Unscrew the side screw of the boardroom lid (use an appropriate screwdriver).
- Remove the lid.
Removing the PSU Holding Chassis:
- Older machines: 3 screws
- Newer machines: 4 screws
- Use the correct screwdriver (T10 or PH2).
- Before removing the last screw, place a cloth under the machine leg to prevent scratches.
- Gently place the chassis on the countertop.
Step 5: Remove the Back Panel For Pro Models:
- Remove the four T10 screws securing the back panel.
For XL or XXL Models:
- Remove the four standoffs using an adjustable wrench or pliers.
- Alternatively, use a T10 screwdriver to press and turn the standoffs.
- Unscrew the intake pipe knob:
- Lift the pipe slightly while holding the tube inside.
- Remove the back panel.
Step 6: Disconnect AC Board Cables
- Press the clip while pulling each cable to release it.
- Remove the ribbon cable (AC/DC board connection):
- Hold the top and bottom of the connector head.
- Gently wiggle it out.
- Unscrew the 5 screws securing the AC board (T10 or PH2).
- Disconnect power wires:
- Use pliers to remove the red wire from the relay.
- Use pliers to remove the black wire from the power switch.
- Remove the AC board from the machine.
- Disconnect the two-pin cable by pressing the clip while pulling.
Step 7: Prepare Wires for New AC Board
- Cut the cable tie on the black/blue tube T-tap connector using nippers.
- Release the latch and open the plastic casing.
- Remove the metal blade (with two wires).
- (Wearing gloves helps grip the blade securely.)
- Pull the black wire out of the metal blade.
Step 8: Install the New AC Board
- Insert the metal blade back into the plastic casing (flat side facing the slot).
- Press the blade further until it slightly protrudes from the back.
- Place the black wire into the opposite side of the casing.
- Close the casing, tighten with pliers, and ensure the latch locks.
- Secure with a new cable tie and trim excess.
- Reconnect wires:
- Plug the red wire into the relay (press firmly with pliers).
- Reconnect the two-pin cable until it clicks.
- Place the AC board back in position.
- Plug the black wire into the power switch.
- Reconnect the ribbon cable:
- Align holes/pins properly.
- Press in until pins are no longer visible.
- Verify all pins are fully inserted.
Step 9: Secure the AC Board
- Install the 5 screws on the back (T10 or PH2).
- Slightly raise the board to align the first hole.
- Tighten the first four screws halfway for alignment.
- Insert the fifth screw, then fully tighten all screws.
- Reconnect all AC board cables (listen for clicks).
Step 10: Reassemble the Machine
- Reinstall the PSU holding chassis (avoid pinching wires).
- Hold the chassis while inserting the first screw.
- Reattach the boardroom lid and secure with a screw.
- Reinstall the back panel:
- Insert the refill water inlet barb connector.
- Hold the panel while tightening the intake lever.
For Pro Models:
- Tighten the four T10 screws.
For XL/XXL Models:
- Reinstall the four standoffs (finger-tighten first, then fully secure with T10).
- Reattach the side panel:
- Insert and tighten the first five screws halfway for alignment.
- Fully tighten all six screws.
Final Check
- Ensure all connections are secure.
- If issues arise, contact tech support.
Done! Your AC board replacement is complete.
#acpcb #pcb #ac #DIY #repair #highvoltage #howto
Updated 2025/07/29